Managing Workspaces
*{{page.description}} We assume you are familiar with hierarchical structure of the platform and why we need workspaces. *
Creating Workspace
Every contract member can create a workspace on the user interface or using an API call.
Please note no matter which method you use to create, a workspace name must adhere to the following standards:
- It must have usable characters like letters, digits, white-spaces, hyphen (
-) and underscore (_). - It must be 3 to 40 characters in length.
Creating workspace: UI
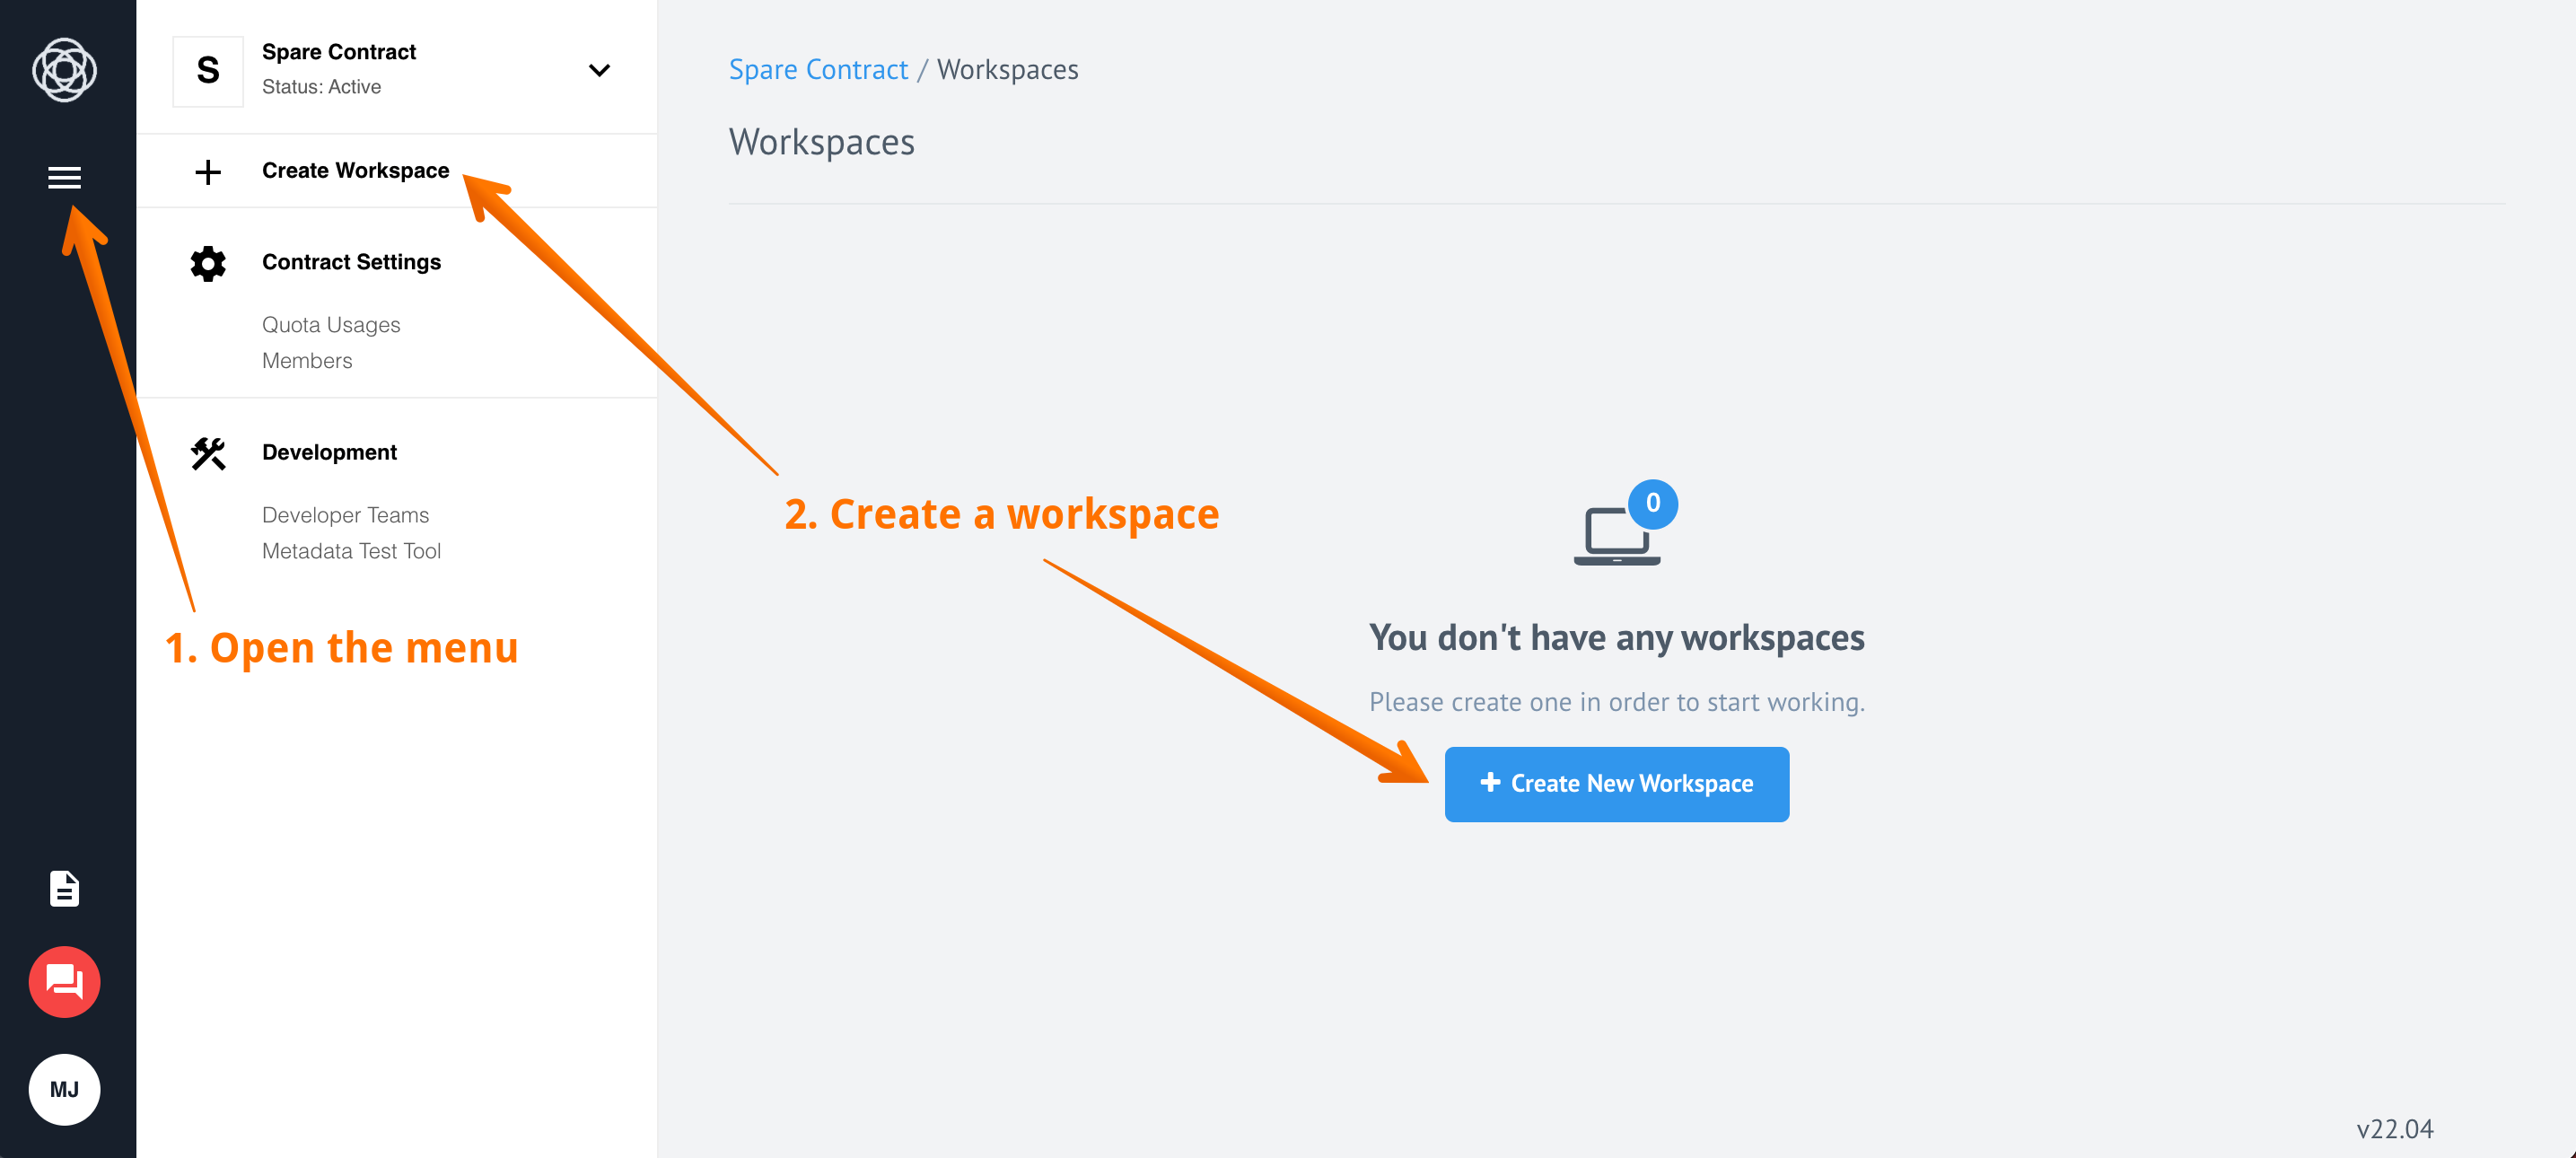
When you start from an empty contract you can open the menu (1), click to create a workspace (2) either from the menu item + Create Workspace or by clicking on a + Create New Workspace button in the middle:
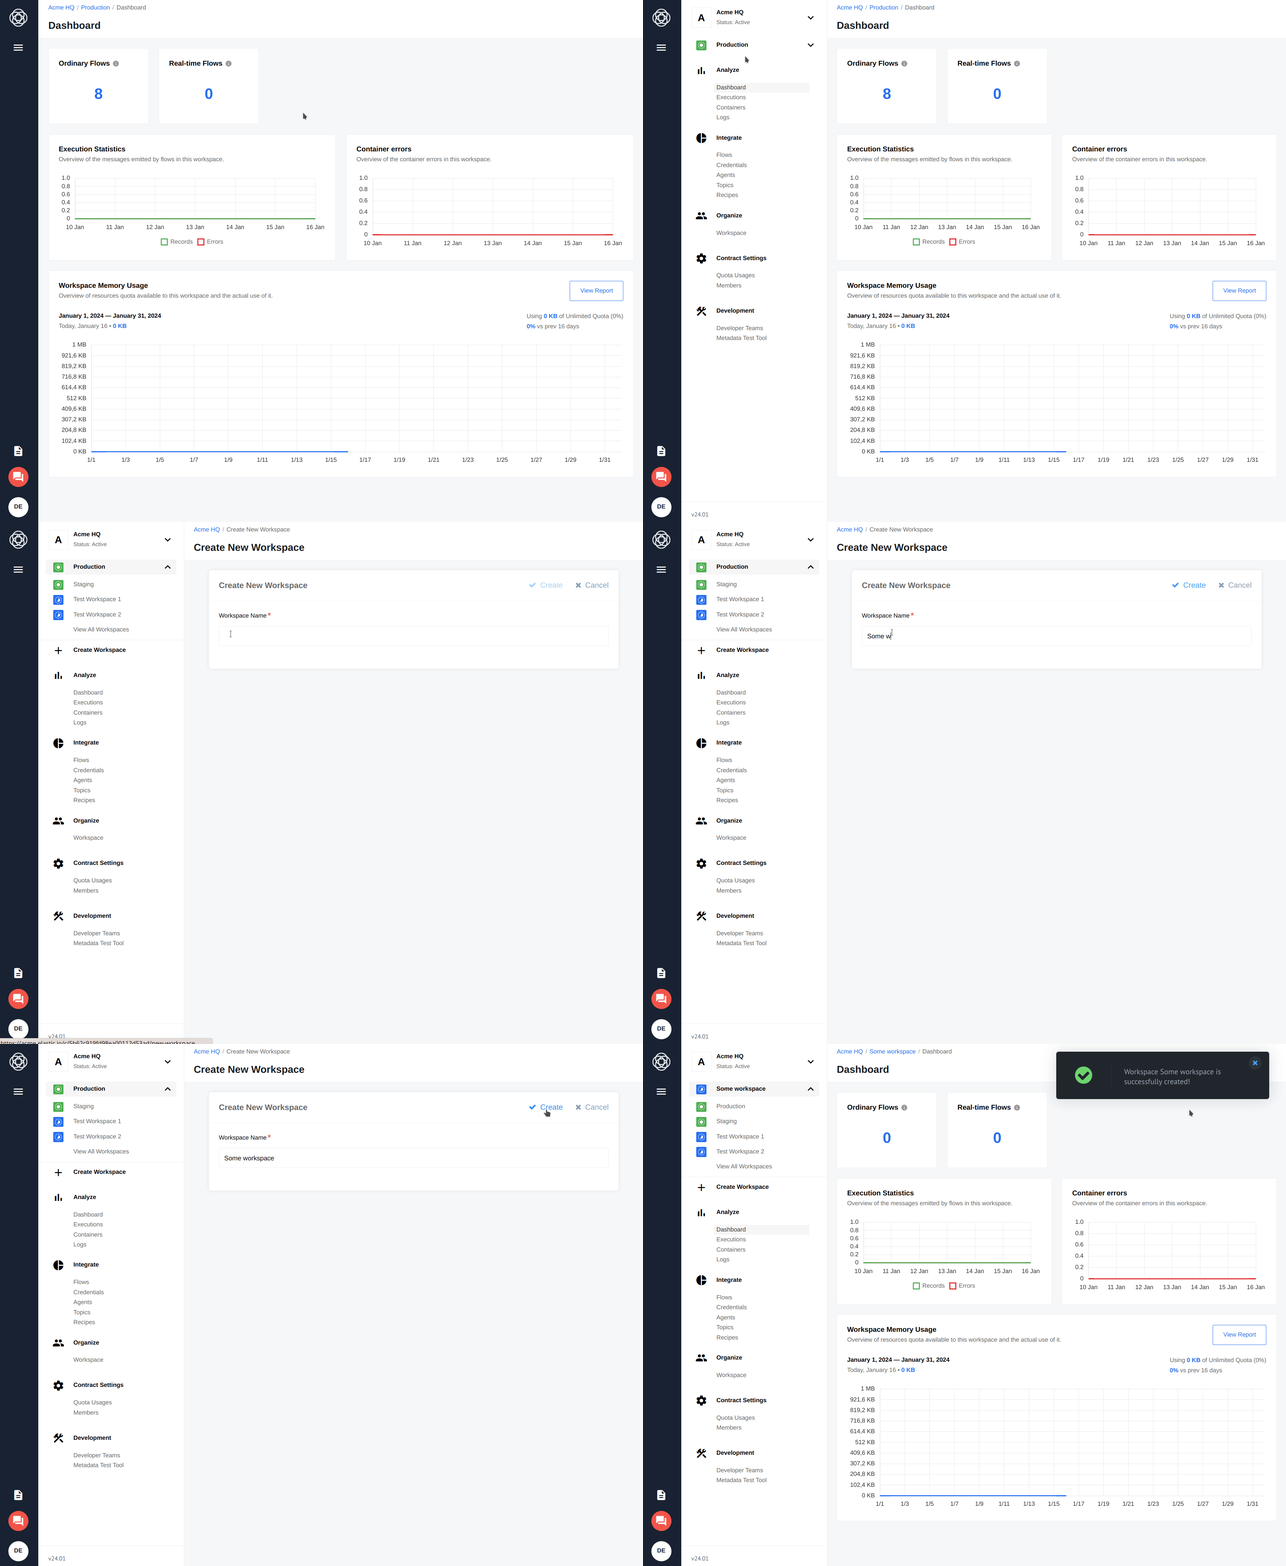
The following animation shows workspace creation in case of fully operation contract:
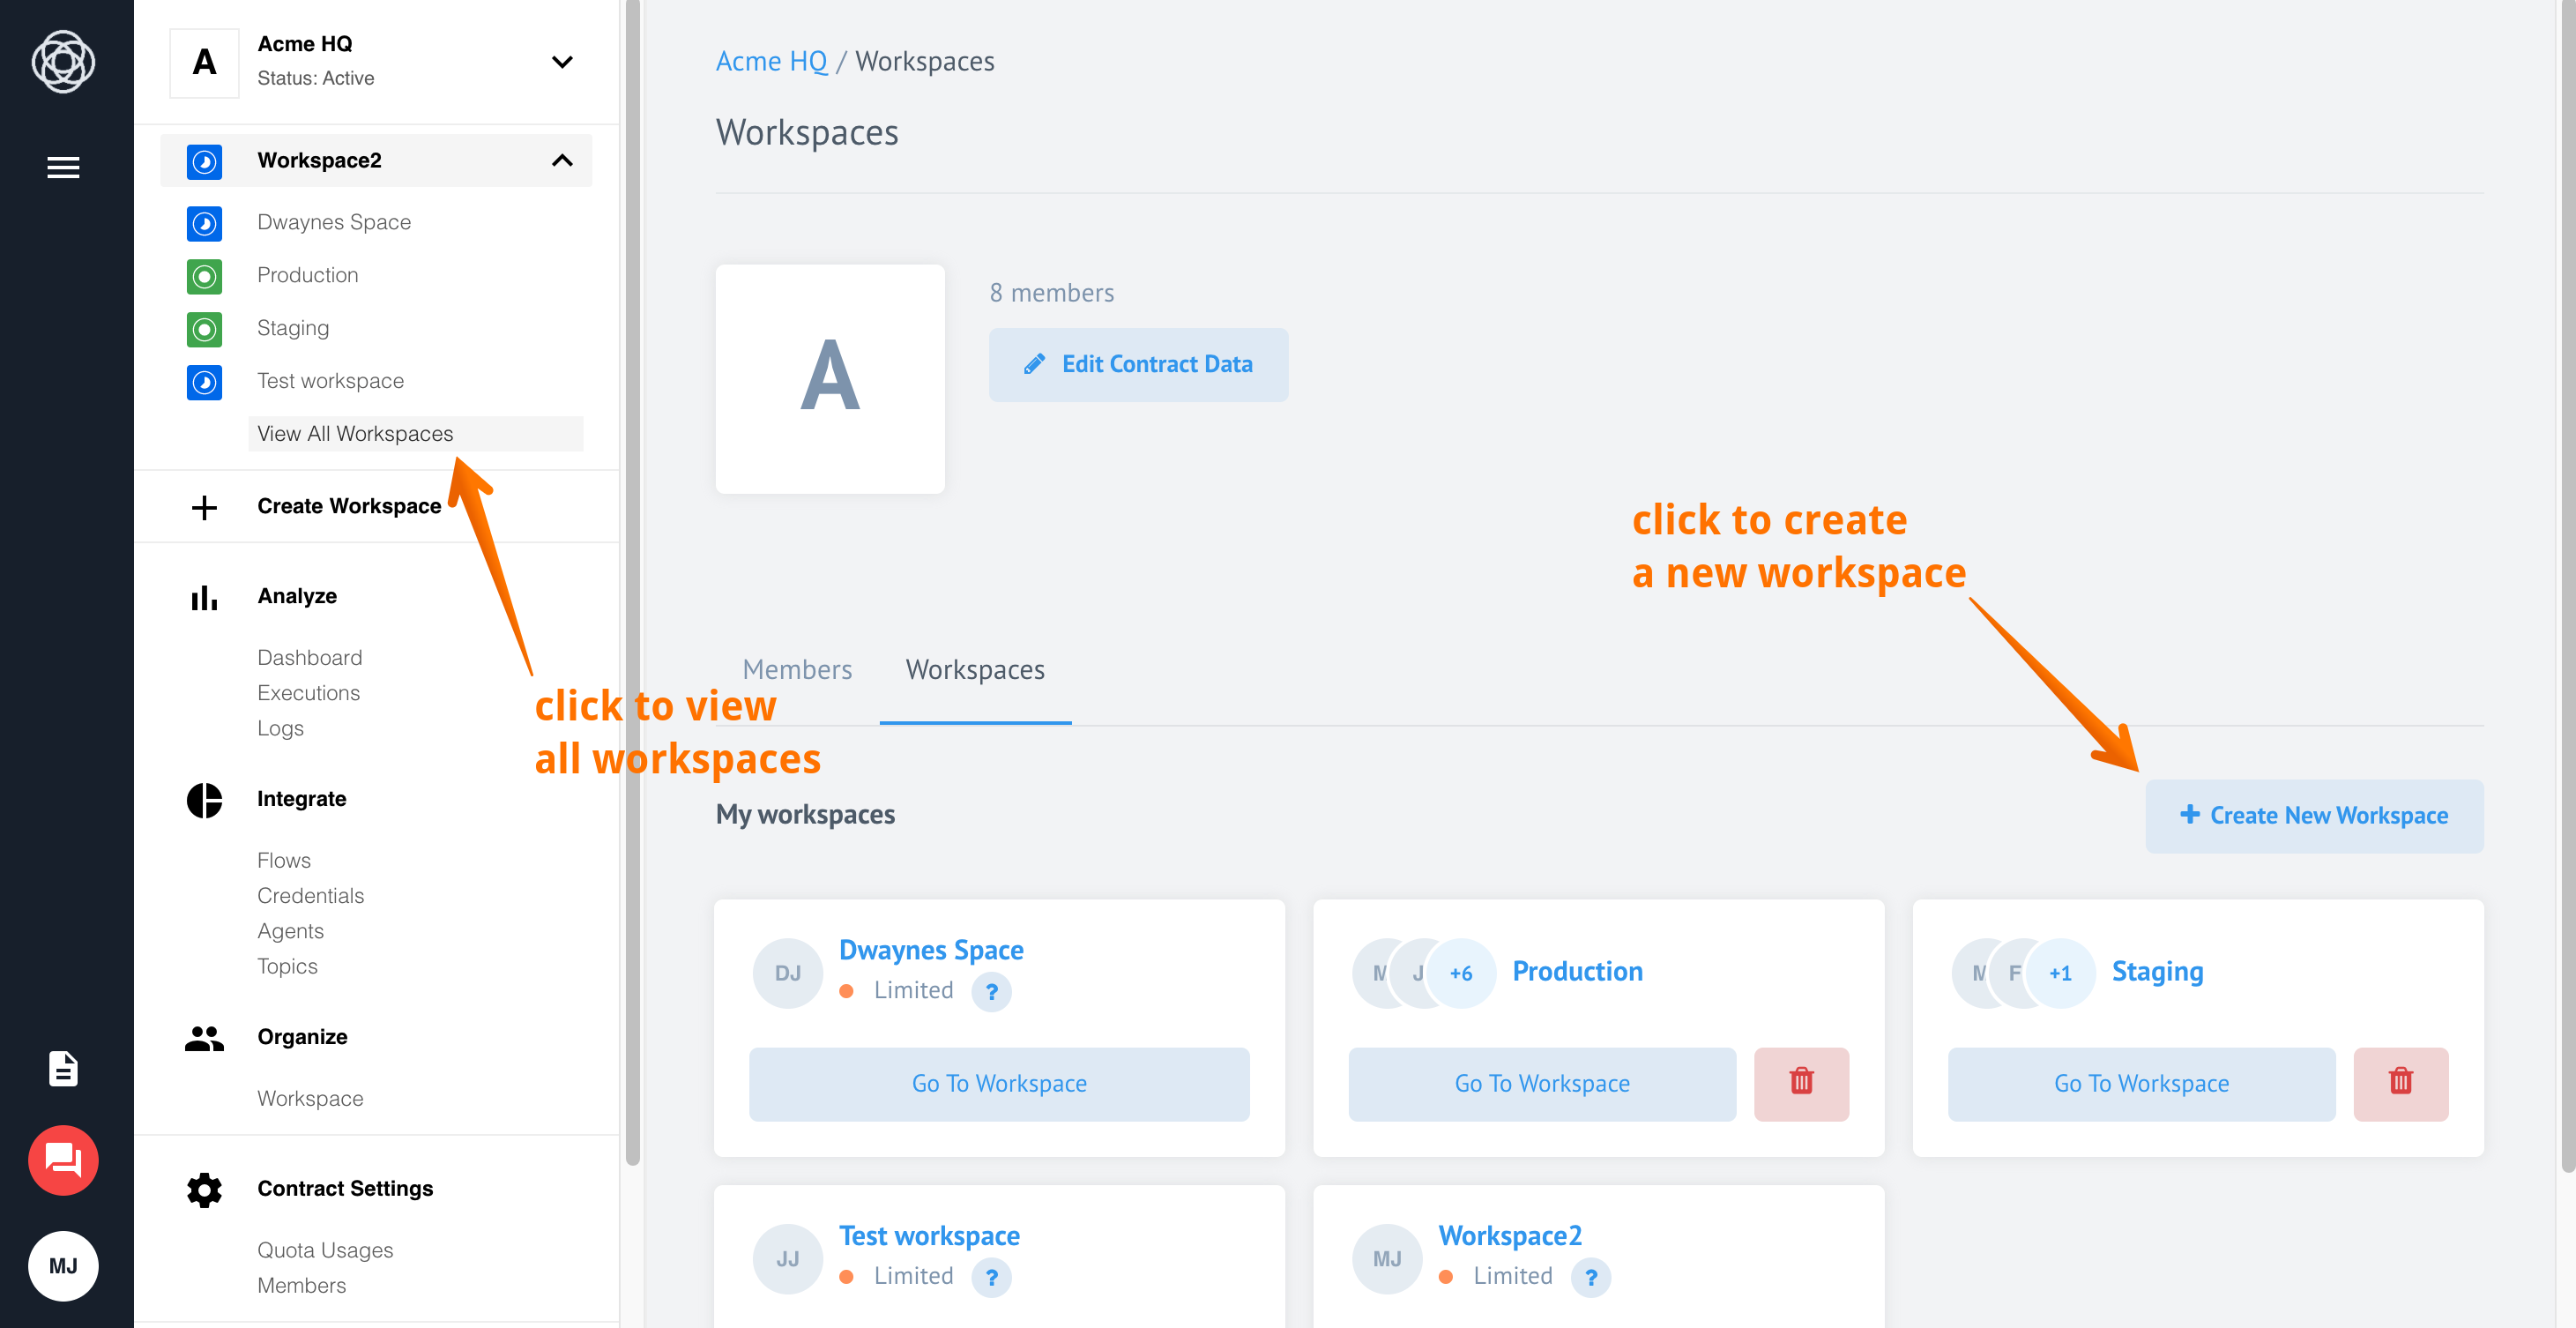
You can create a Workspace when viewing all workspaces page as well. Open the menu, and expand the workspace list and click on View All Workspaces menu item to navigate to all workspaces page. Here you can create a new one by clicking on + Create New Workspace button.
Creating workspace: API
To create a workspace you can use our API call. Note that you must use your email and APIKEY
to authenticate. Check the platform tour profile information section if unsure where to find this information.
Please note that you have to be a member of the Contract’s scope and need
contracts.workspace.createpermission to access this resource.
Editing Workspace
With the right permissions a workspace member can perform workspace management via the UI or the API.
Editing workspace: UI
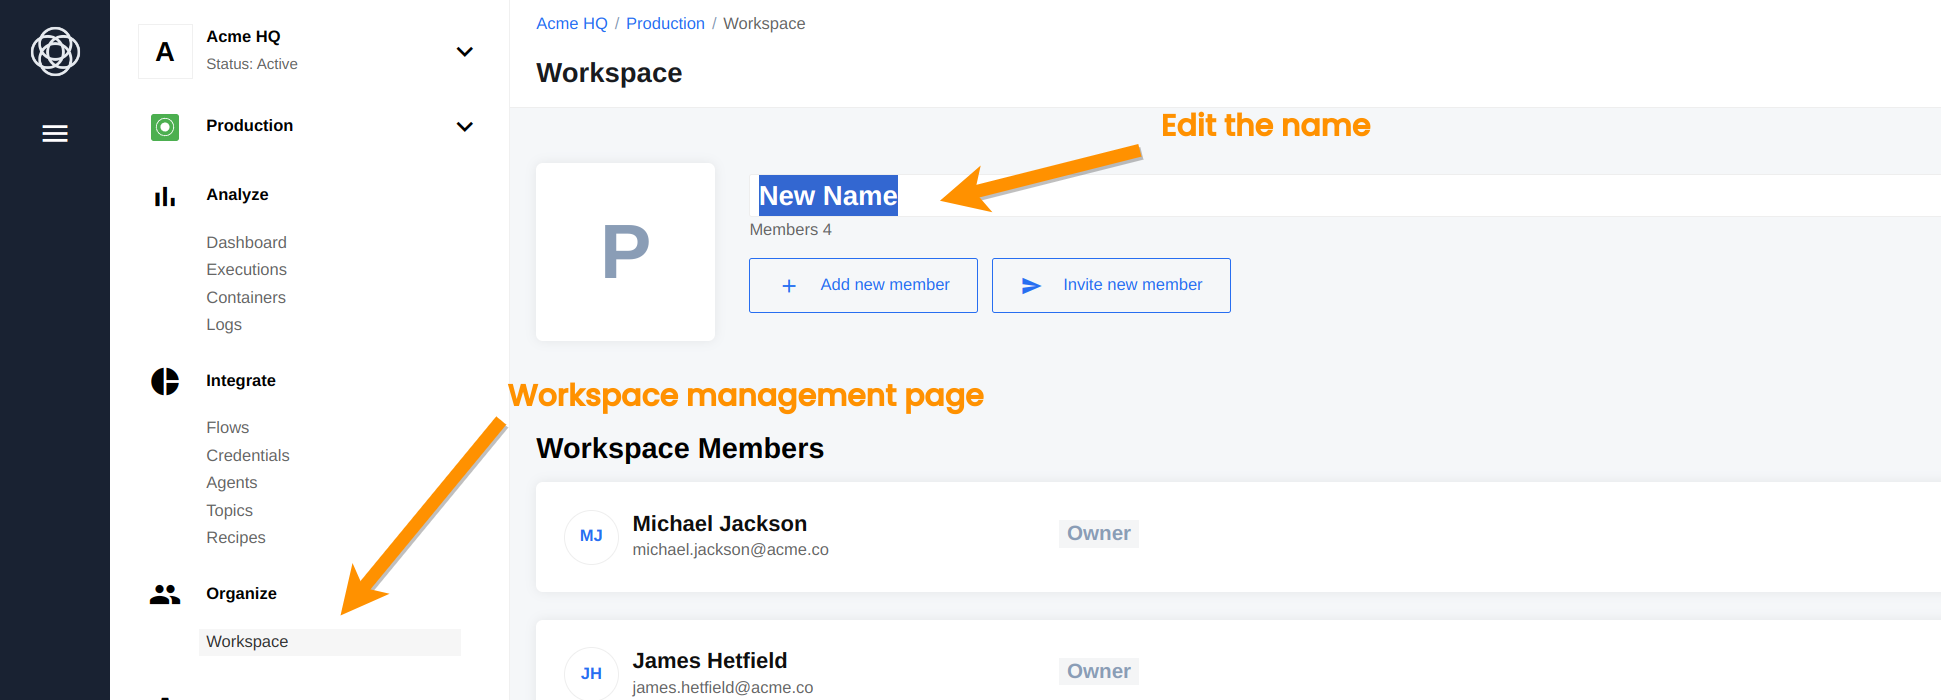
You can rename the workspace via the user interface open the menu and click on the Organize > Workspace item to navigate to the workspace management page. Now click on the name of the workspace to edit.
Please note to edit the workspace type from
limitedtofullor back you must contact your tenant administration. They can edit the type usingtenantAdminaccess rights via an API call.
Editing workspace: API
You can edit the workspace record using our API call providing your email and APIKEY
to authenticate.
Please note that you have to be a member of the Contract’s scope and need
workspaces.workspace.editpermission to access this resource. To update the type of Workspace you needworkspaces.workspace.edit_typepermission.
Deleting workspace
As with most operations described on this page, you can delete a workspace either via the UI or the API.
Before you can proceed with this operation you must keep in mind that this is an irreversible process. This means we cannot undo this and all the following associated resources will be deleted:
- Credentials in this workspace,
- VPN agents,
- Data samples generated by integrated steps,
- Invitations; all invitation tokens will not work,
- Lookup tables,
- Flow’s Dynamic Metadata,
- Flow’s Dynamic Select Model data,
- Flow’s Execution Statistics,
- Flow’s Execution Results,
- Flows and their versions,
- Flow’s Errors and their details.
Deleting workspace: UI
To delete a workspace click on Organize > Workspace item to navigate to the workspace management page. Scroll down to find Delete workspace button.

When you click on this button a warning message would show with the following text:
Delete workspace Name
Are you sure you want to delete this workspace permanently? Deleting this workspace is an irreversible process, we cannot undo a deletion if you complete the process by accident.
You can press Cancel to stop deletion process or press on Delete workspace to permanently delete it.
Deleting workspace: API
To delete workspace via the API please use the corresponding endpoint. Here you must only provide the ID of the workspace. For more information, visit the API documentation.
Please note No warning message comes when you execute this call via the API.
Workspace members
You can add, invite and manage members in your workspace using either the UI or the API.
The workspace Owner role allows you to add and manage members in your workspace.
To invite new members not included in the contract to your workspace you must
have an Owner role in contract as well.
Managing workspace members: UI
You can do all user related tasks on the workspace management page. Choose the workspace where you need to perform this operations (1), click on Organise > Workspace to load the page (2). Here you can add, invite, edit and delete members (3). Let us consider each case separately.
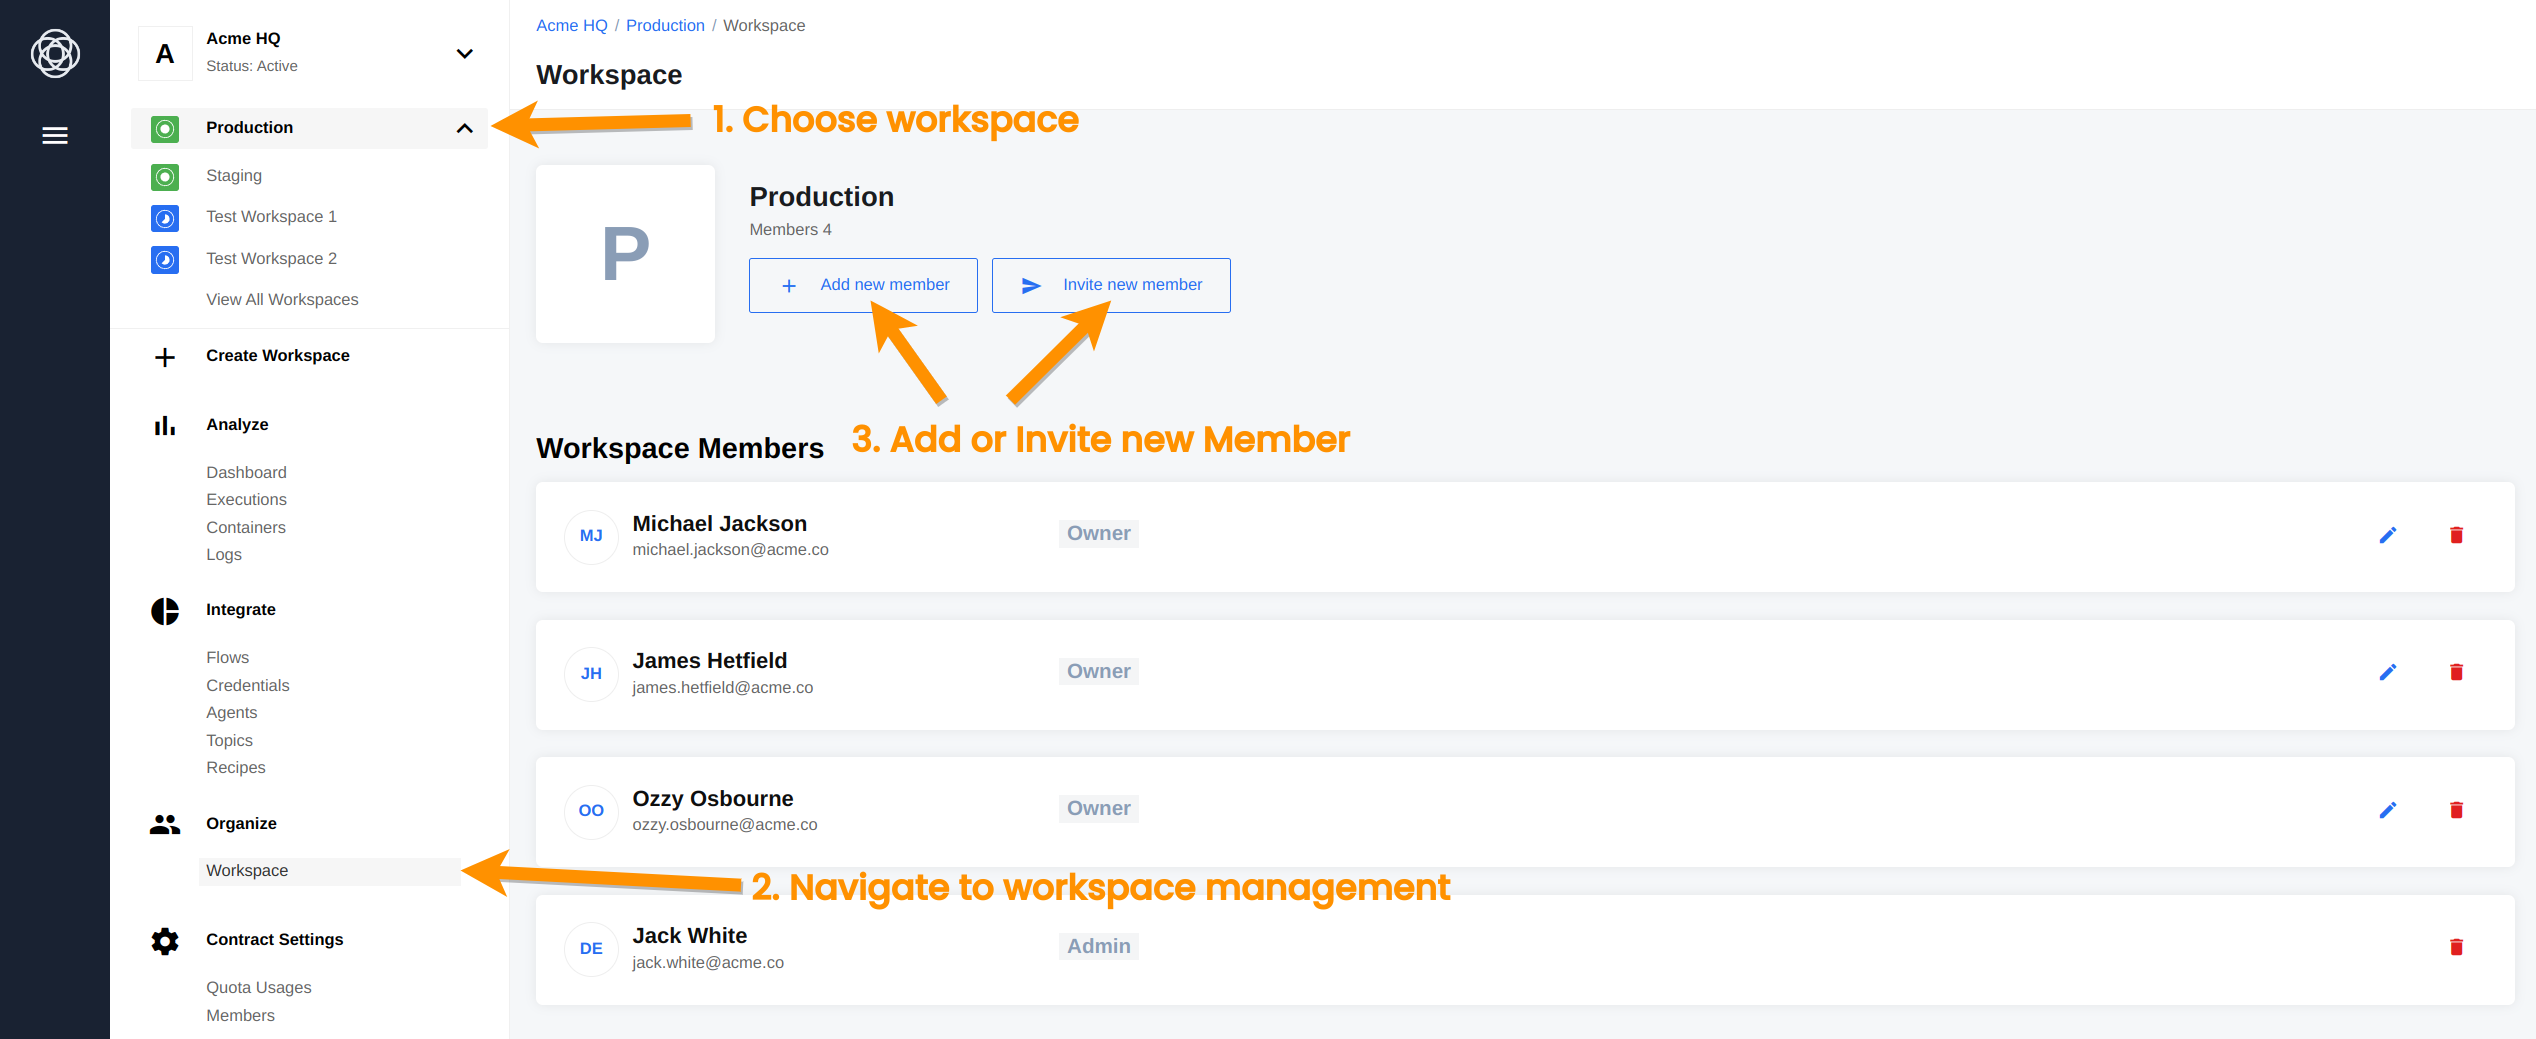
Please Note when you have lower than Admin role in the contract you will not see Invite new member button.
Add member via UI
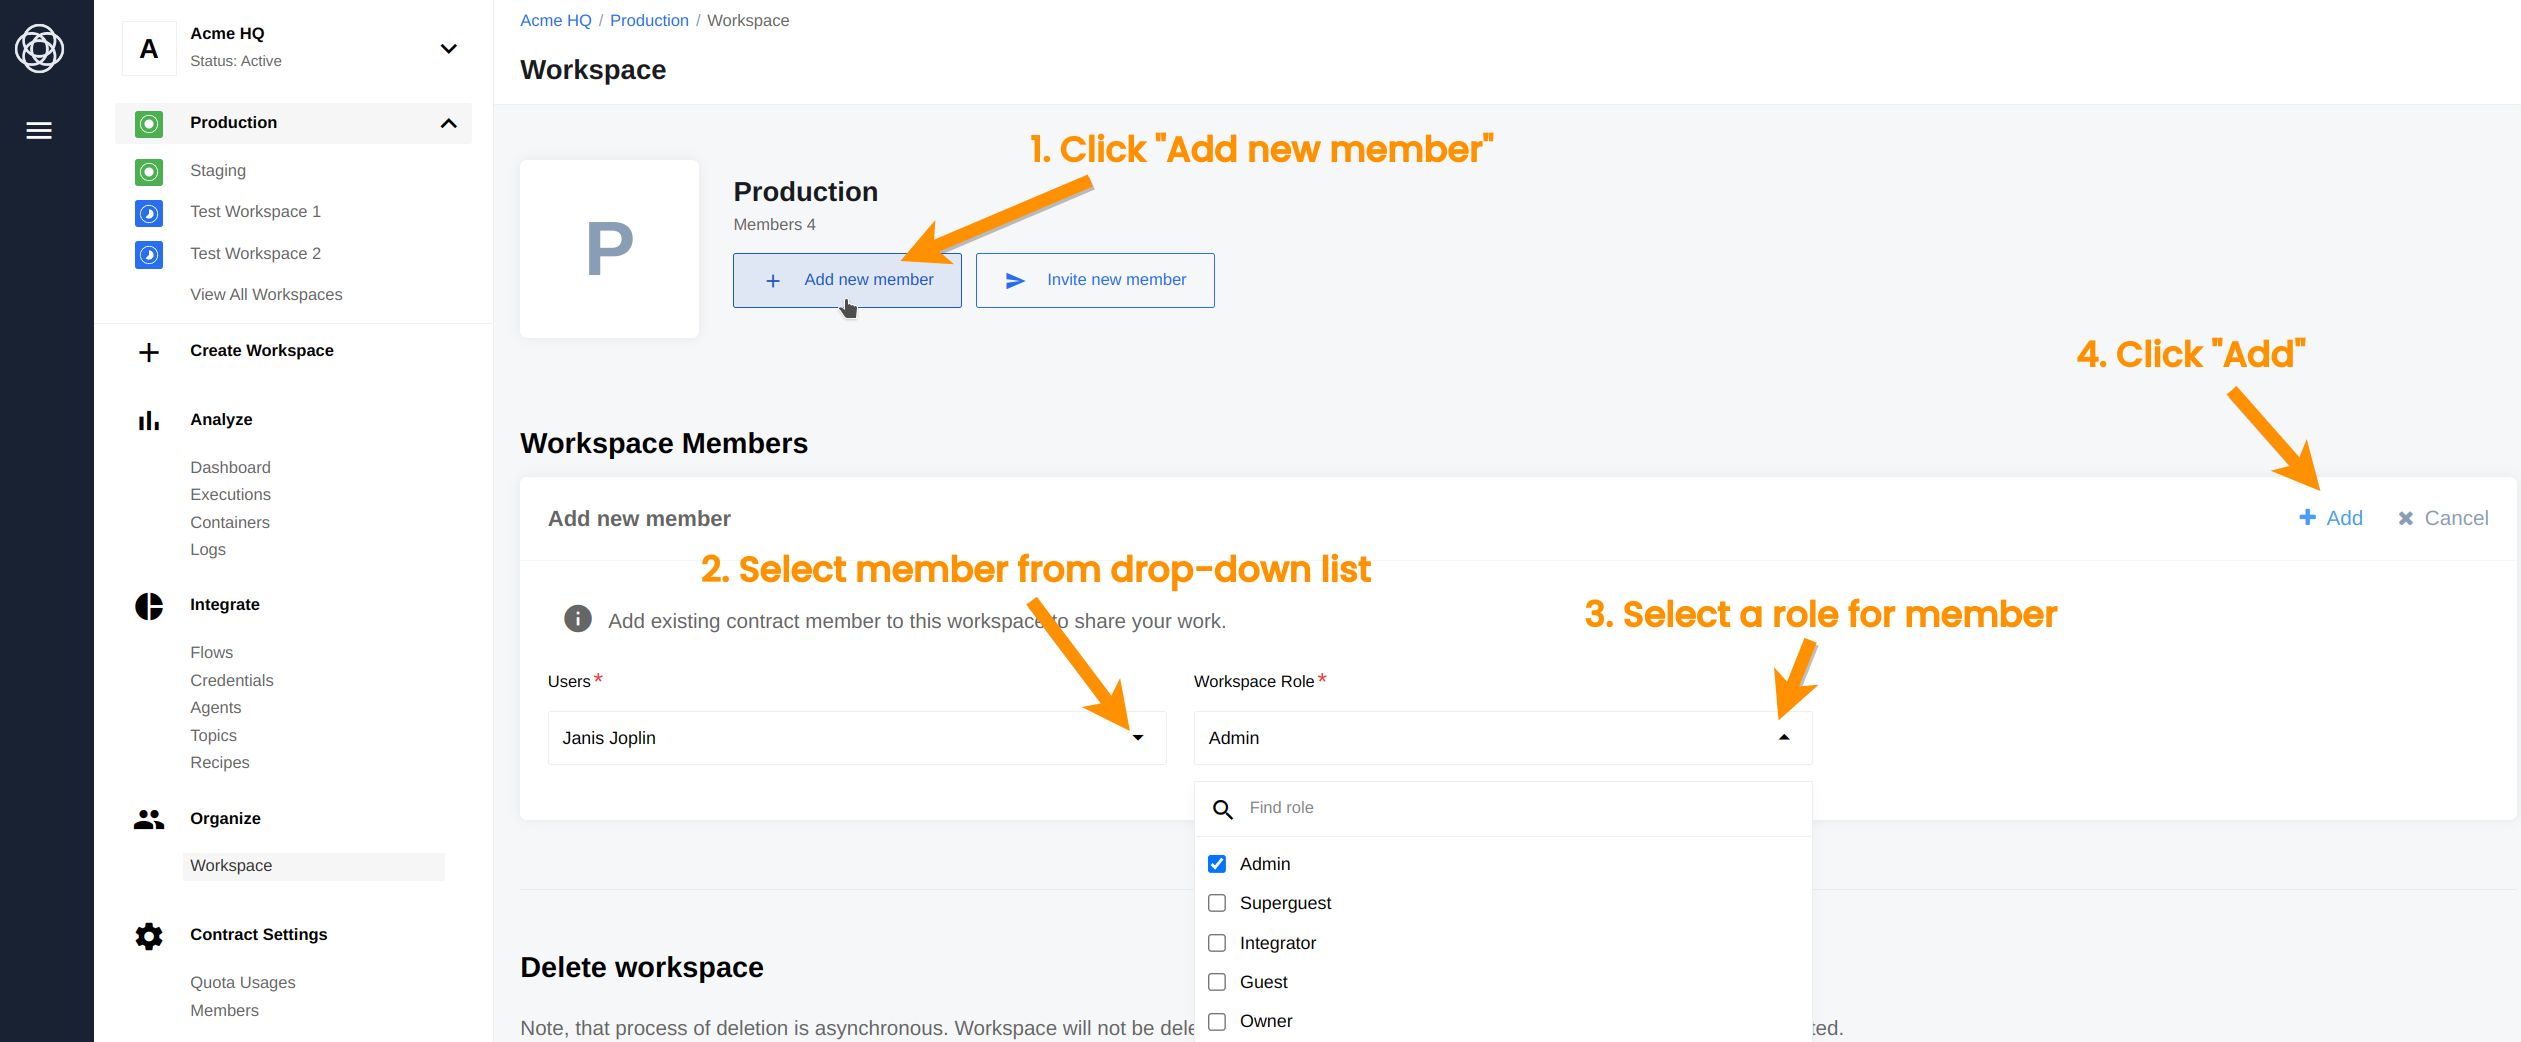
To add a member to your workspace follow these steps:
- Click on + Add new member button to load Add new member form above the existing member’s list.
- Click to open the drop-down menu for selecting members. Here you will have all present members of the current contract listed, select the desired user.
- Next select a role for this new member in your workspace from the drop-down menu and then
- click on + Add link to finish.
Invite member via UI
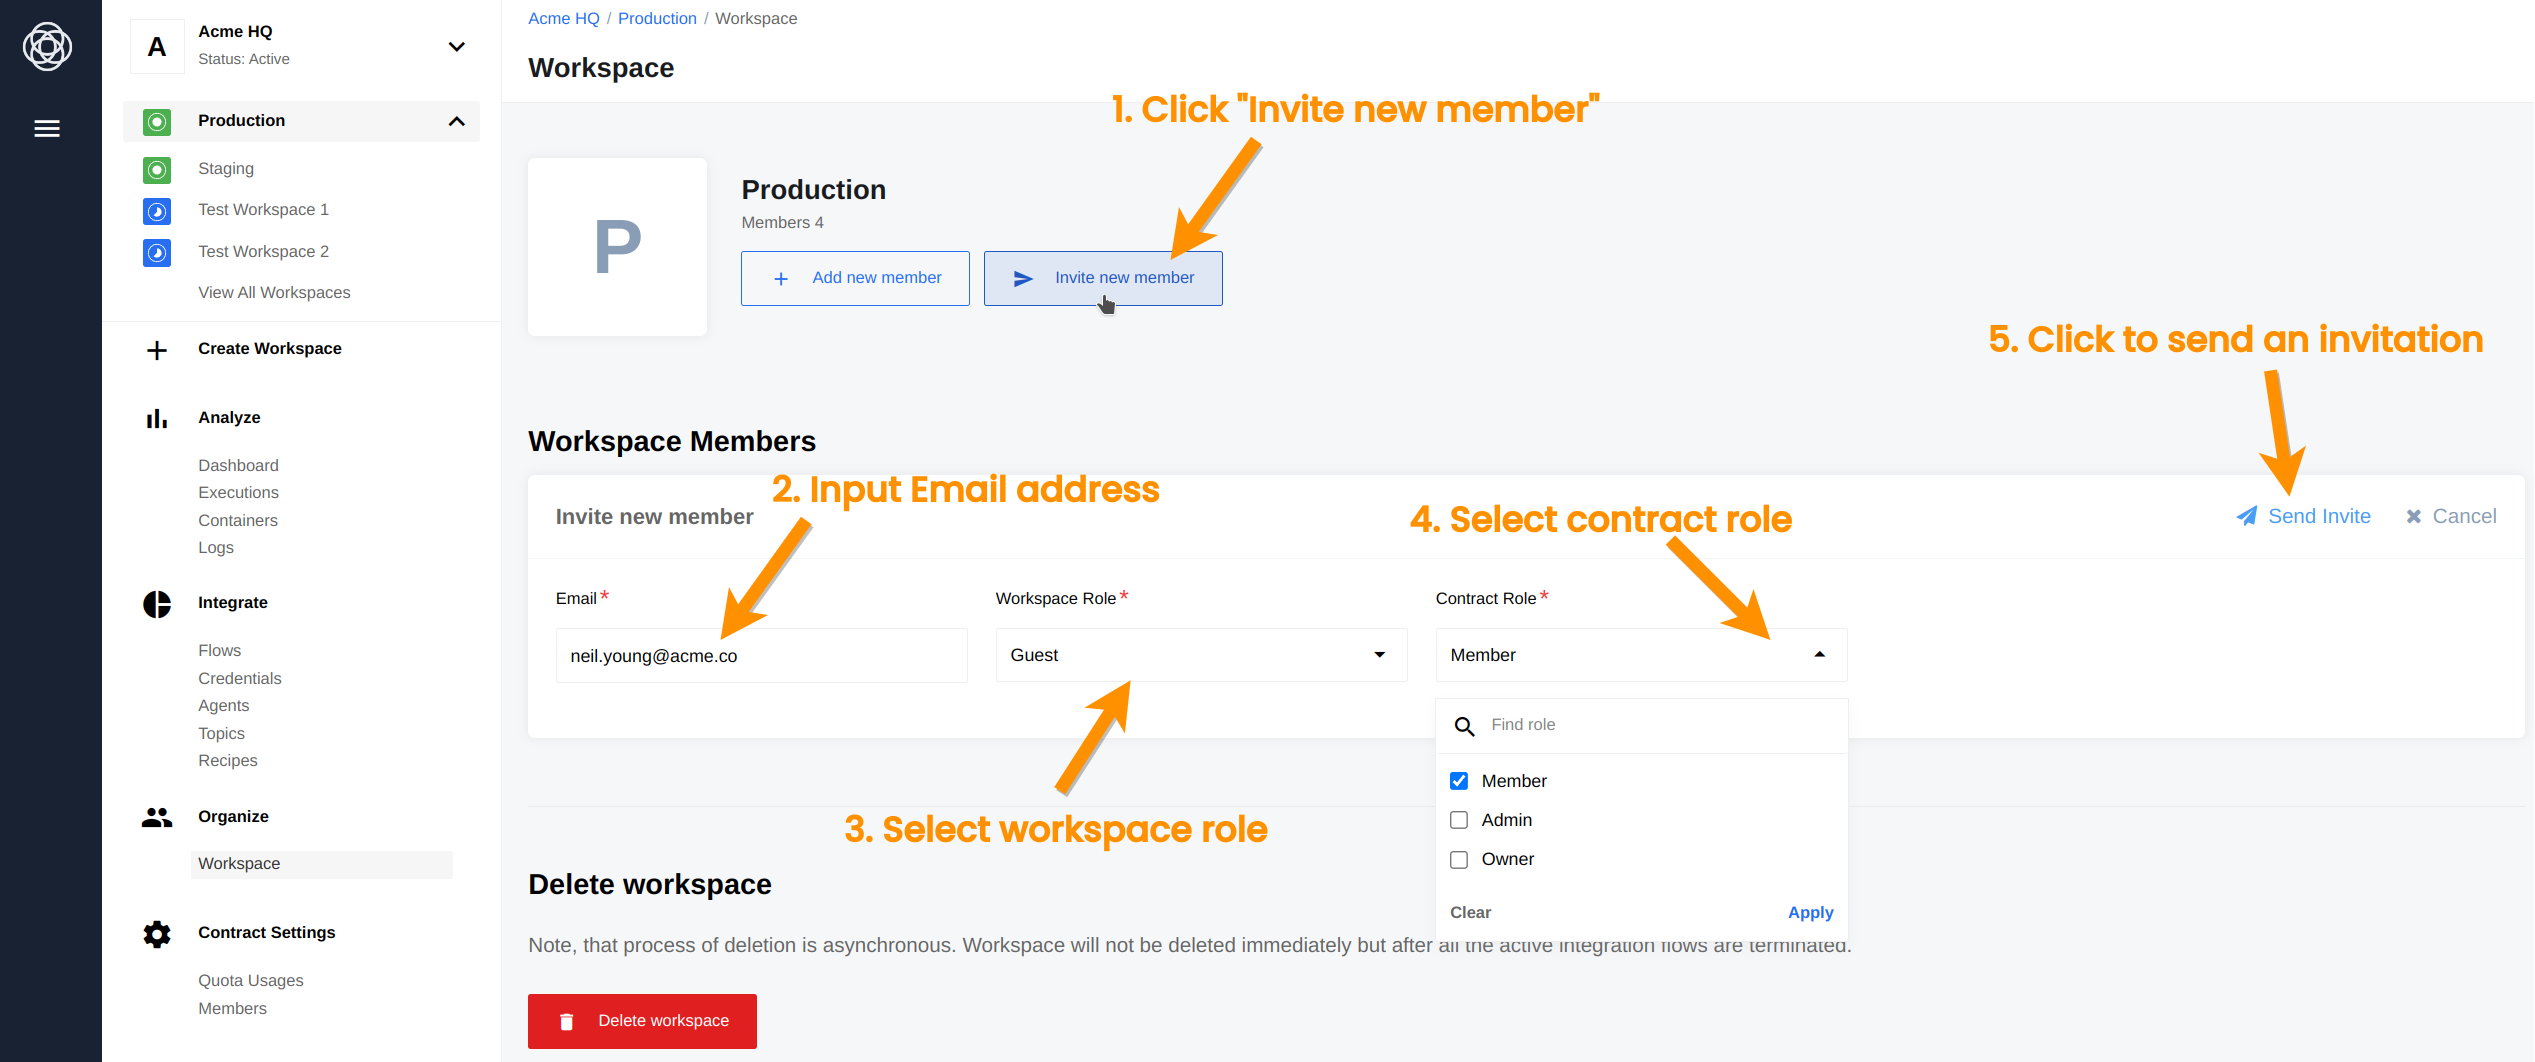
To invite a new member to your workspace follow these steps:
- Click on Invite new member button (if it exist) to load Invite new member form above the existing member’s list.
- Input the email address of the person you wish to invite.
- Select the contract role to grant. You can choose one or combination of
Owner,AdminandMemberuser roles. - Select the workspace role. You can choose from existing roles available for the workspace.
- Click to send the invitation. Our system will send an invitation to join your contract and the workspace.
Edit or delete member via UI
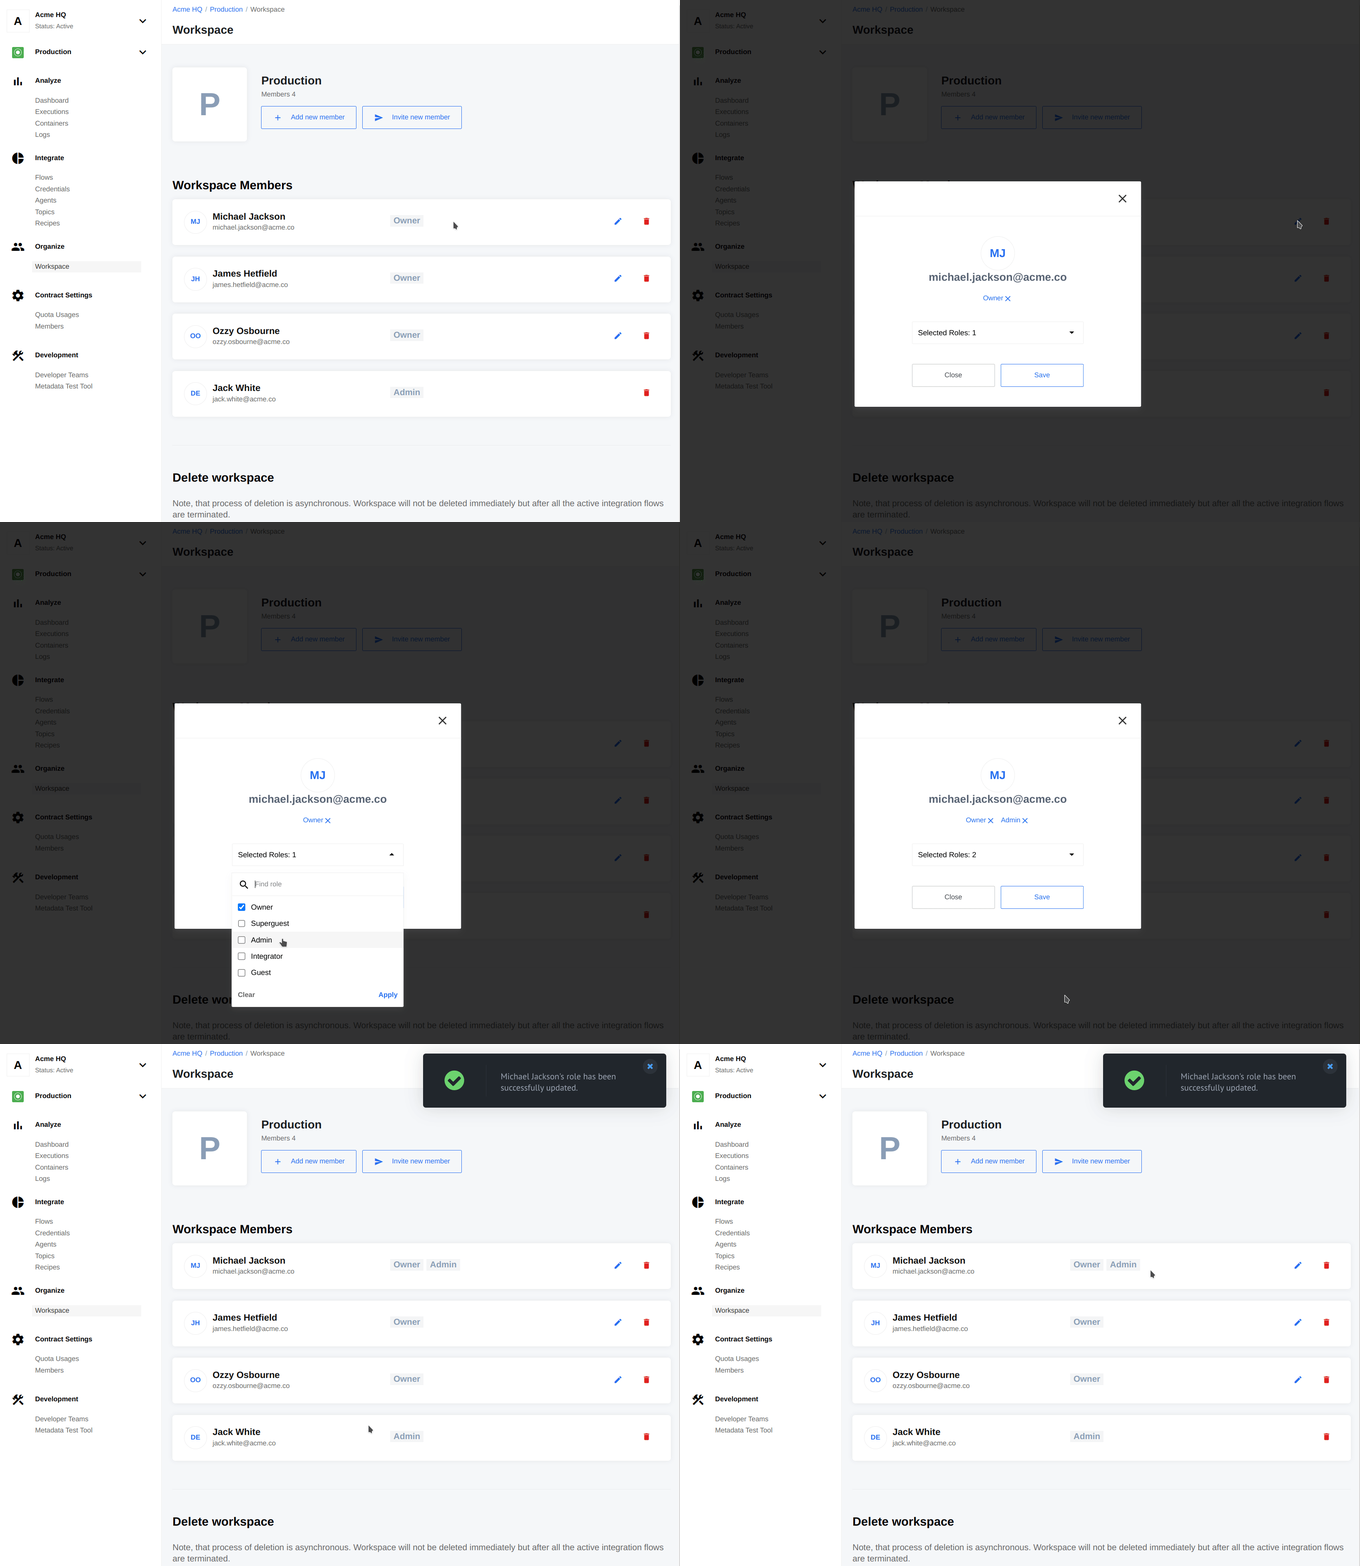
From this page you can edit user roles or delete them
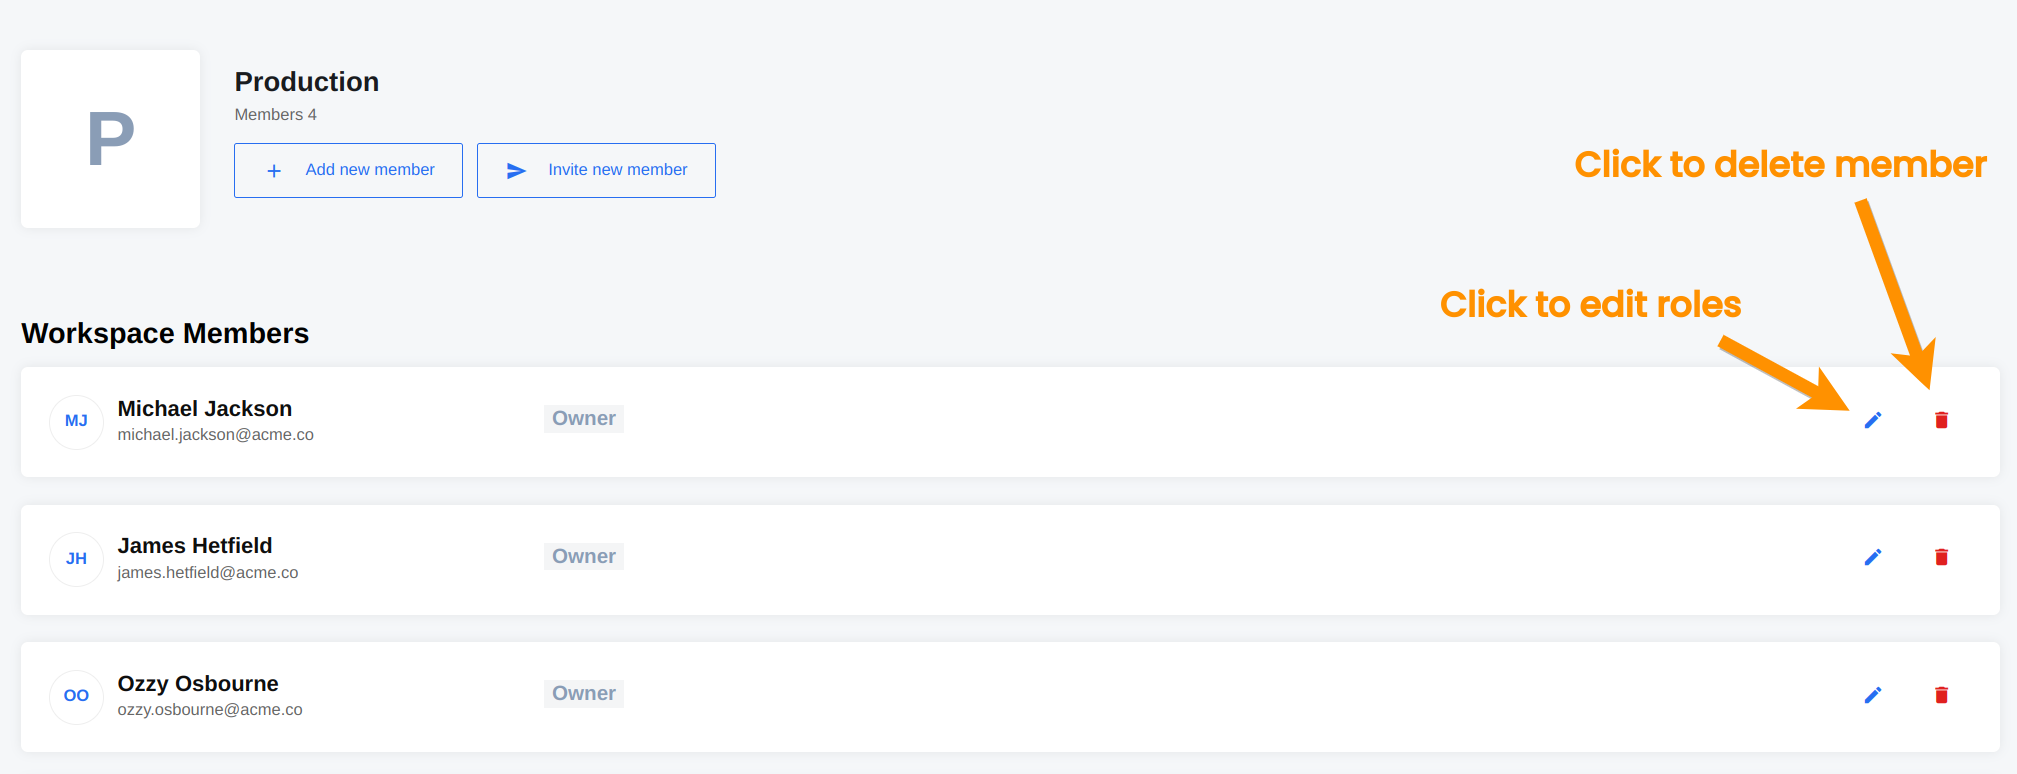
When you delete a members. the system would transfer all Flows, security credentials and Data Samples to your member.
Editing the member means changing the roles. The following animation shows more:
Managing workspace members: API
You can add, update and delete members in your workspace using API calls. For more informations on how to do that and even more please visit the API documentation.